Every homeowner encounters minor plumbing issues from time to time. Among the simpler yet often overlooked tasks is the need to replace an outdoor faucet spigot. This little fixture ensures that your outdoor watering needs are met efficiently. Over time, wear and tear can render it inefficient, leading to leaks or even a complete breakdown. To maintain convenience around your home, knowing how to safely replace an outdoor faucet spigot can be a valuable skill. That said, if this task feels daunting, you can always rely on professional plumbing services in Charlotte, NC, to handle it for you.
In this guide, we'll walk through the process of replacing an outdoor faucet spigot in a safe and efficient manner. We’ll cover the tools required, the steps involved, and some tips to avoid common mistakes. You'll also learn when it might be prudent to call in the experts. Whether you're a DIY enthusiast or just looking to tackle small home maintenance issues, this guide will equip you with the necessary know-how.
Understanding the Need to Replace an Outdoor Faucet Spigot
Outdoor faucets, also known as hose bibs or spigots, are subjected to harsh weather conditions. Over time, they may corrode, freeze, or become damaged due to frequent use. Such issues can cause leaks, leading to water wastage and increased utility bills. In some cases, a faulty spigot can contribute to more serious problems like water damage to your home's foundation. This is why replacing an outdoor faucet spigot when it shows signs of malfunction is crucial.
Before diving into the replacement process, let's identify some common signs that indicate it's time for a new spigot. Persistent leaks, difficulty in turning the handle, and visible corrosion are clear indicators. If you're experiencing any of these issues, preparing for a replacement is a wise decision.
Tools You'll Need for the Replacement Process
Before embarking on this task, gather the necessary tools to ensure the process goes smoothly. Here’s a simple list of items you’ll need:
- Adjustable wrench
- Pipe tape (Teflon tape)
- Pipe wrench or channel locks
- Replacement spigot
- Screwdriver
- Bucket (to catch any residual water)
Having these tools at your disposal will make the replacement process much more manageable. Additionally, they’ll help minimize the risk of causing damage to the plumbing system during the repair.
Step-by-Step Guide to Replacing an Outdoor Faucet Spigot
- Turn Off the Water Supply: The first and most crucial step is to shut off the water supply leading to the outdoor faucet. This is typically done via an interior shut-off valve. Ensure the water is completely turned off to avoid any unwanted water flow during the process.
- Drain the Residual Water: Open the outdoor faucet to drain any remaining water in the pipe. Have the bucket ready to catch residual water and prevent any mess.
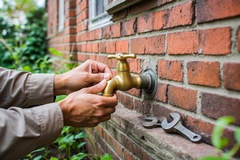
- Remove the Old Spigot: Use the adjustable wrench to grip the base of the old spigot. Carefully turn the spigot counterclockwise to unscrew it from the pipe. If it’s stuck, gentle tapping might help, but be cautious to avoid breaking the pipe.
- Prepare the Pipe: Once removed, clean the pipe threads thoroughly. Apply Teflon tape to the threads. This will provide a secure seal and prevent leaks once the new spigot is installed.
- Install the New Spigot: Take the replacement spigot and carefully screw it onto the pipe threads, turning it clockwise. Use the pipe wrench or channel locks to tighten it securely. Make sure it’s snug but avoid overtightening, which could damage the pipe.
- Test the Installation: Once installed, turn the water supply back on and check the spigot. Ensure there are no leaks around the connection. A properly installed spigot should operate smoothly without any water leakage.
Common Mistakes to Avoid
While the process might seem straightforward, there are common pitfalls to be aware of. One mistake is not turning off the water supply completely, which can lead to flooding. Additionally, overtightening the spigot can damage the pipe threads, leading to leaks or a broken pipe. Finally, skipping the step of applying Teflon tape can result in water leakage and inefficient water flow.
If at any point you feel uncertain or encounter unexpected issues, consider contacting a professional. There are numerous experienced professionals who offer plumbing repairs and replacements in Charlotte and its surrounding cities, ensuring the job is done right.
Expert Tips for a Smooth Replacement
- Regular Maintenance: Periodically check your outdoor faucets for leaks or signs of damage, especially before the winter months when freezing can cause significant damage.
- Quality Replacement Parts: Invest in high-quality spigots to ensure durability and longevity, especially if your area experiences harsh weather.
- Be Patient: If the old spigot is challenging to remove, take your time. Forcing it can lead to damaged pipes, making the repair much more complicated and costly.
While many homeowners enjoy the satisfaction of handling repairs, there are times when it’s more efficient to call in expert help. For more significant issues, such as emergency plumbing in the Marvin area, it's best to rely on seasoned professionals.
Maximizing Your Home’s Plumbing Efficiency
Ensuring your outdoor faucets are in proper working condition not only helps with efficient water use but also prevents potential plumbing issues that can escalate over time. Simple maintenance and timely replacement of an outdoor faucet spigot can avert the cost and hassle of major repairs down the line.
For those times when you might feel overwhelmed or when you want the assurance of professional intervention, remember that Providence Plumbing stands ready to assist you with top-notch plumbing services across various locations. Connect with them today for all your plumbing needs and experience peace of mind knowing your home’s plumbing is in expert hands.